
Finally got a MicroSD Card Working!
Intro
GEEZ! I thought the BME280 sensor was hard to get working, but this was a whole new level of pain. After almost a month of troubleshooting and debugging, I finally got a MicroSD card working with my STM32 F767ZI board. I was able to read and write some basic text to it using the FatFs library.
It took so much work though. I couldn’t find a standard MicroSD breakout board that everyone was using, so I went through quite a journey to get something that worked.
HiLetgo MicroSD Breakout Board
I initially bought a set of HiLetgo MicroSD breakout boards from Amazon. They were cheap and seemed to be popular, so I thought they would work fine. However, I quickly ran into issues.

There were two main issues. One was that the board wasn’t able to be powered by the 3.3V regular supply on my Nucleo board. I had to use a 5V supply instead. None of the tutorials or LLMs I looked at mentioned this, so I spent a lot of time trying to figure out why the board wasn’t working with the 3.3V supply.
The other issue was that the boards was really flaky and noisy. I had to swap out the board several times because it would respond with the incorrect hex codes when I tried basic SPI communication debugging.
Switching to an Adafruit MicroSD Breakout Board
Because of the 5V issue, I ended up buying an Adafruit MicroSD breakout board. It was a bit more expensive, and it took 3 weeks to get here, but I figured it would be higher quality than the HiLetgo boards and it would work with the 3.3V supply.
[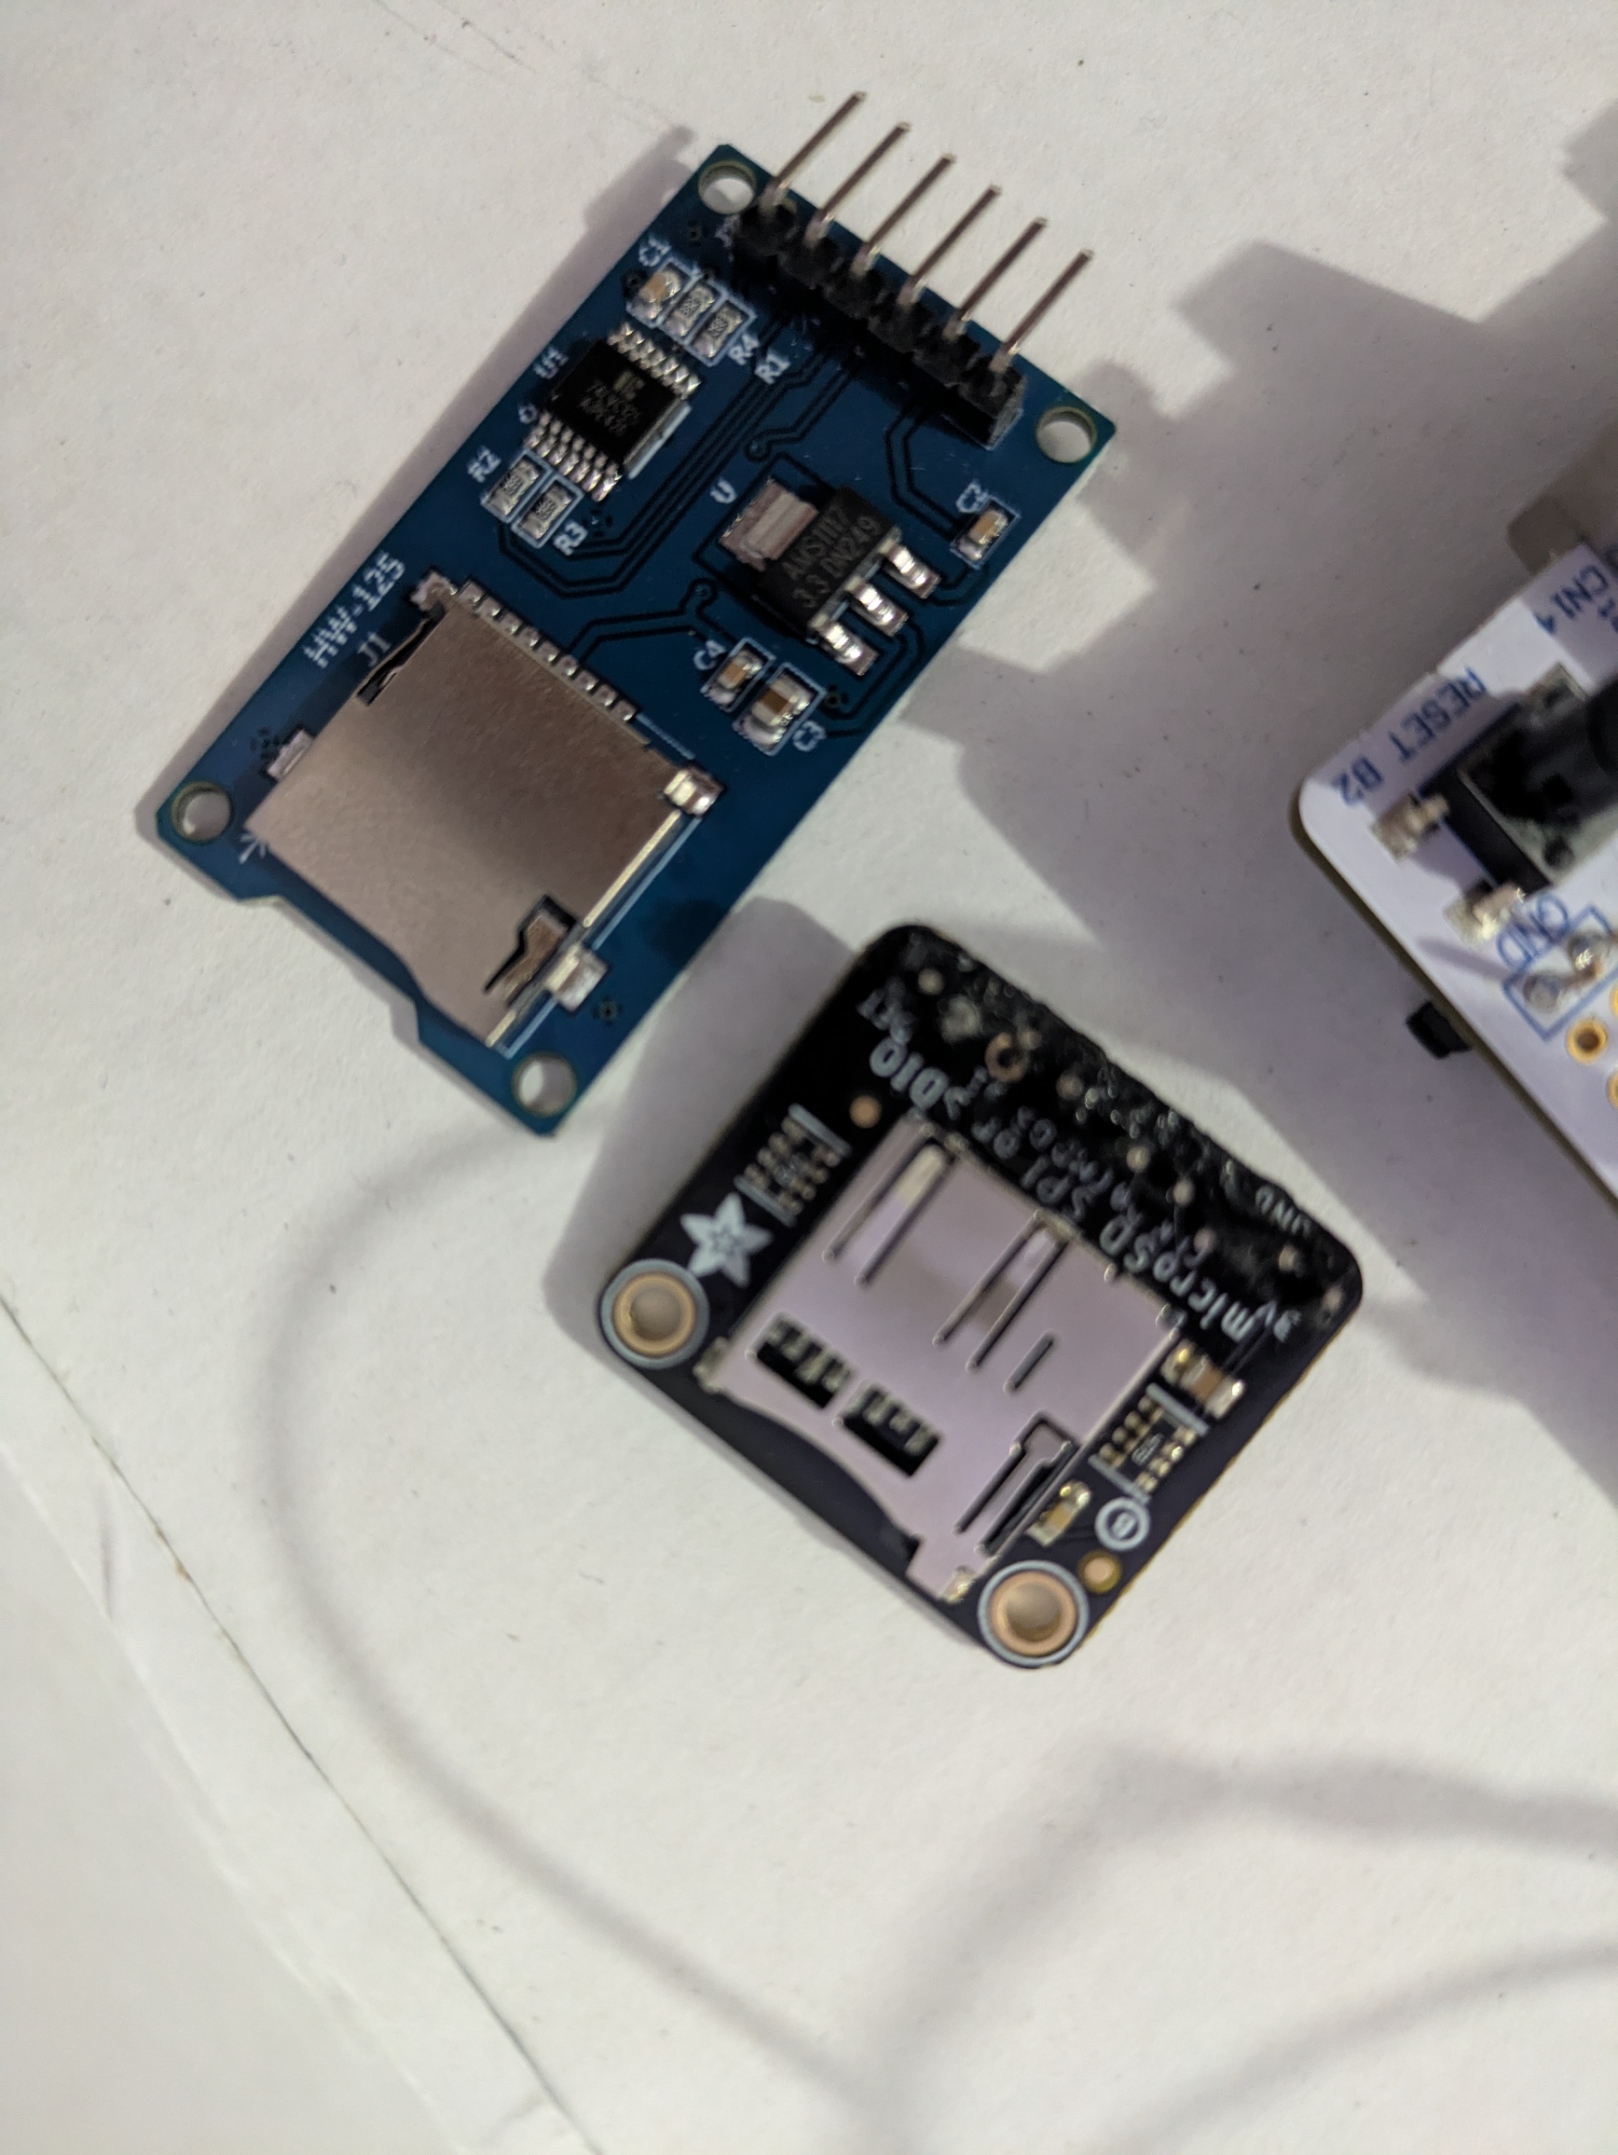 ](/assets/posts/2025-08-20-microsd_card_working/non_working_microsd.jpg
Unfortunately, I ended up making some mistakes while soldering the header pins to the board. I had to re-solder them several times, and I may have ended up damaging the board in the process.
I’m not 100% sure, but this board also didn’t respond during my initial testing.
The solution!
I eventually took a break and came back to start from scratch. Instead of following the full tutorials to set up the MicroSD card, I decided to just try to get basic SPI communication working first.
I wired the board using the shortest jumper wires I had, with the SCK, MOSI and MISO wires twisted together to reduce noise.
I also moved the board away from all my other connections as much as I could.
Then, I used ChatGPT to just get some basic SPI debugging code working. I used the HAL SPI functions to send and receive some basic data, and I was able to get a response from the MicroSD card!
One big error I believe I kept making was that we can’t enable the pull up resistors on the clock lines. The pull ups help in the other lines, but the clock needs to be able to move freely.
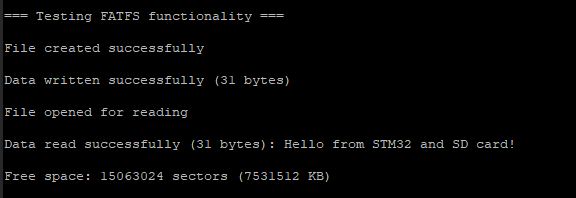
Then, I enabled the Fatfs library in STM32CubeMX and configured it to use the SPI interface I had set up. I was then able to read and write some basic text to the card!
Next Steps
Finally I can start working on this again. Next, I want to make the mounting of the filesystem more robust, then I want to actually implement proper logging of my sensor data from my BME280 sensor to the MicroSD card, with a timestamp and everything.