
A Massive Improvement to the CNN
A New Training Setup
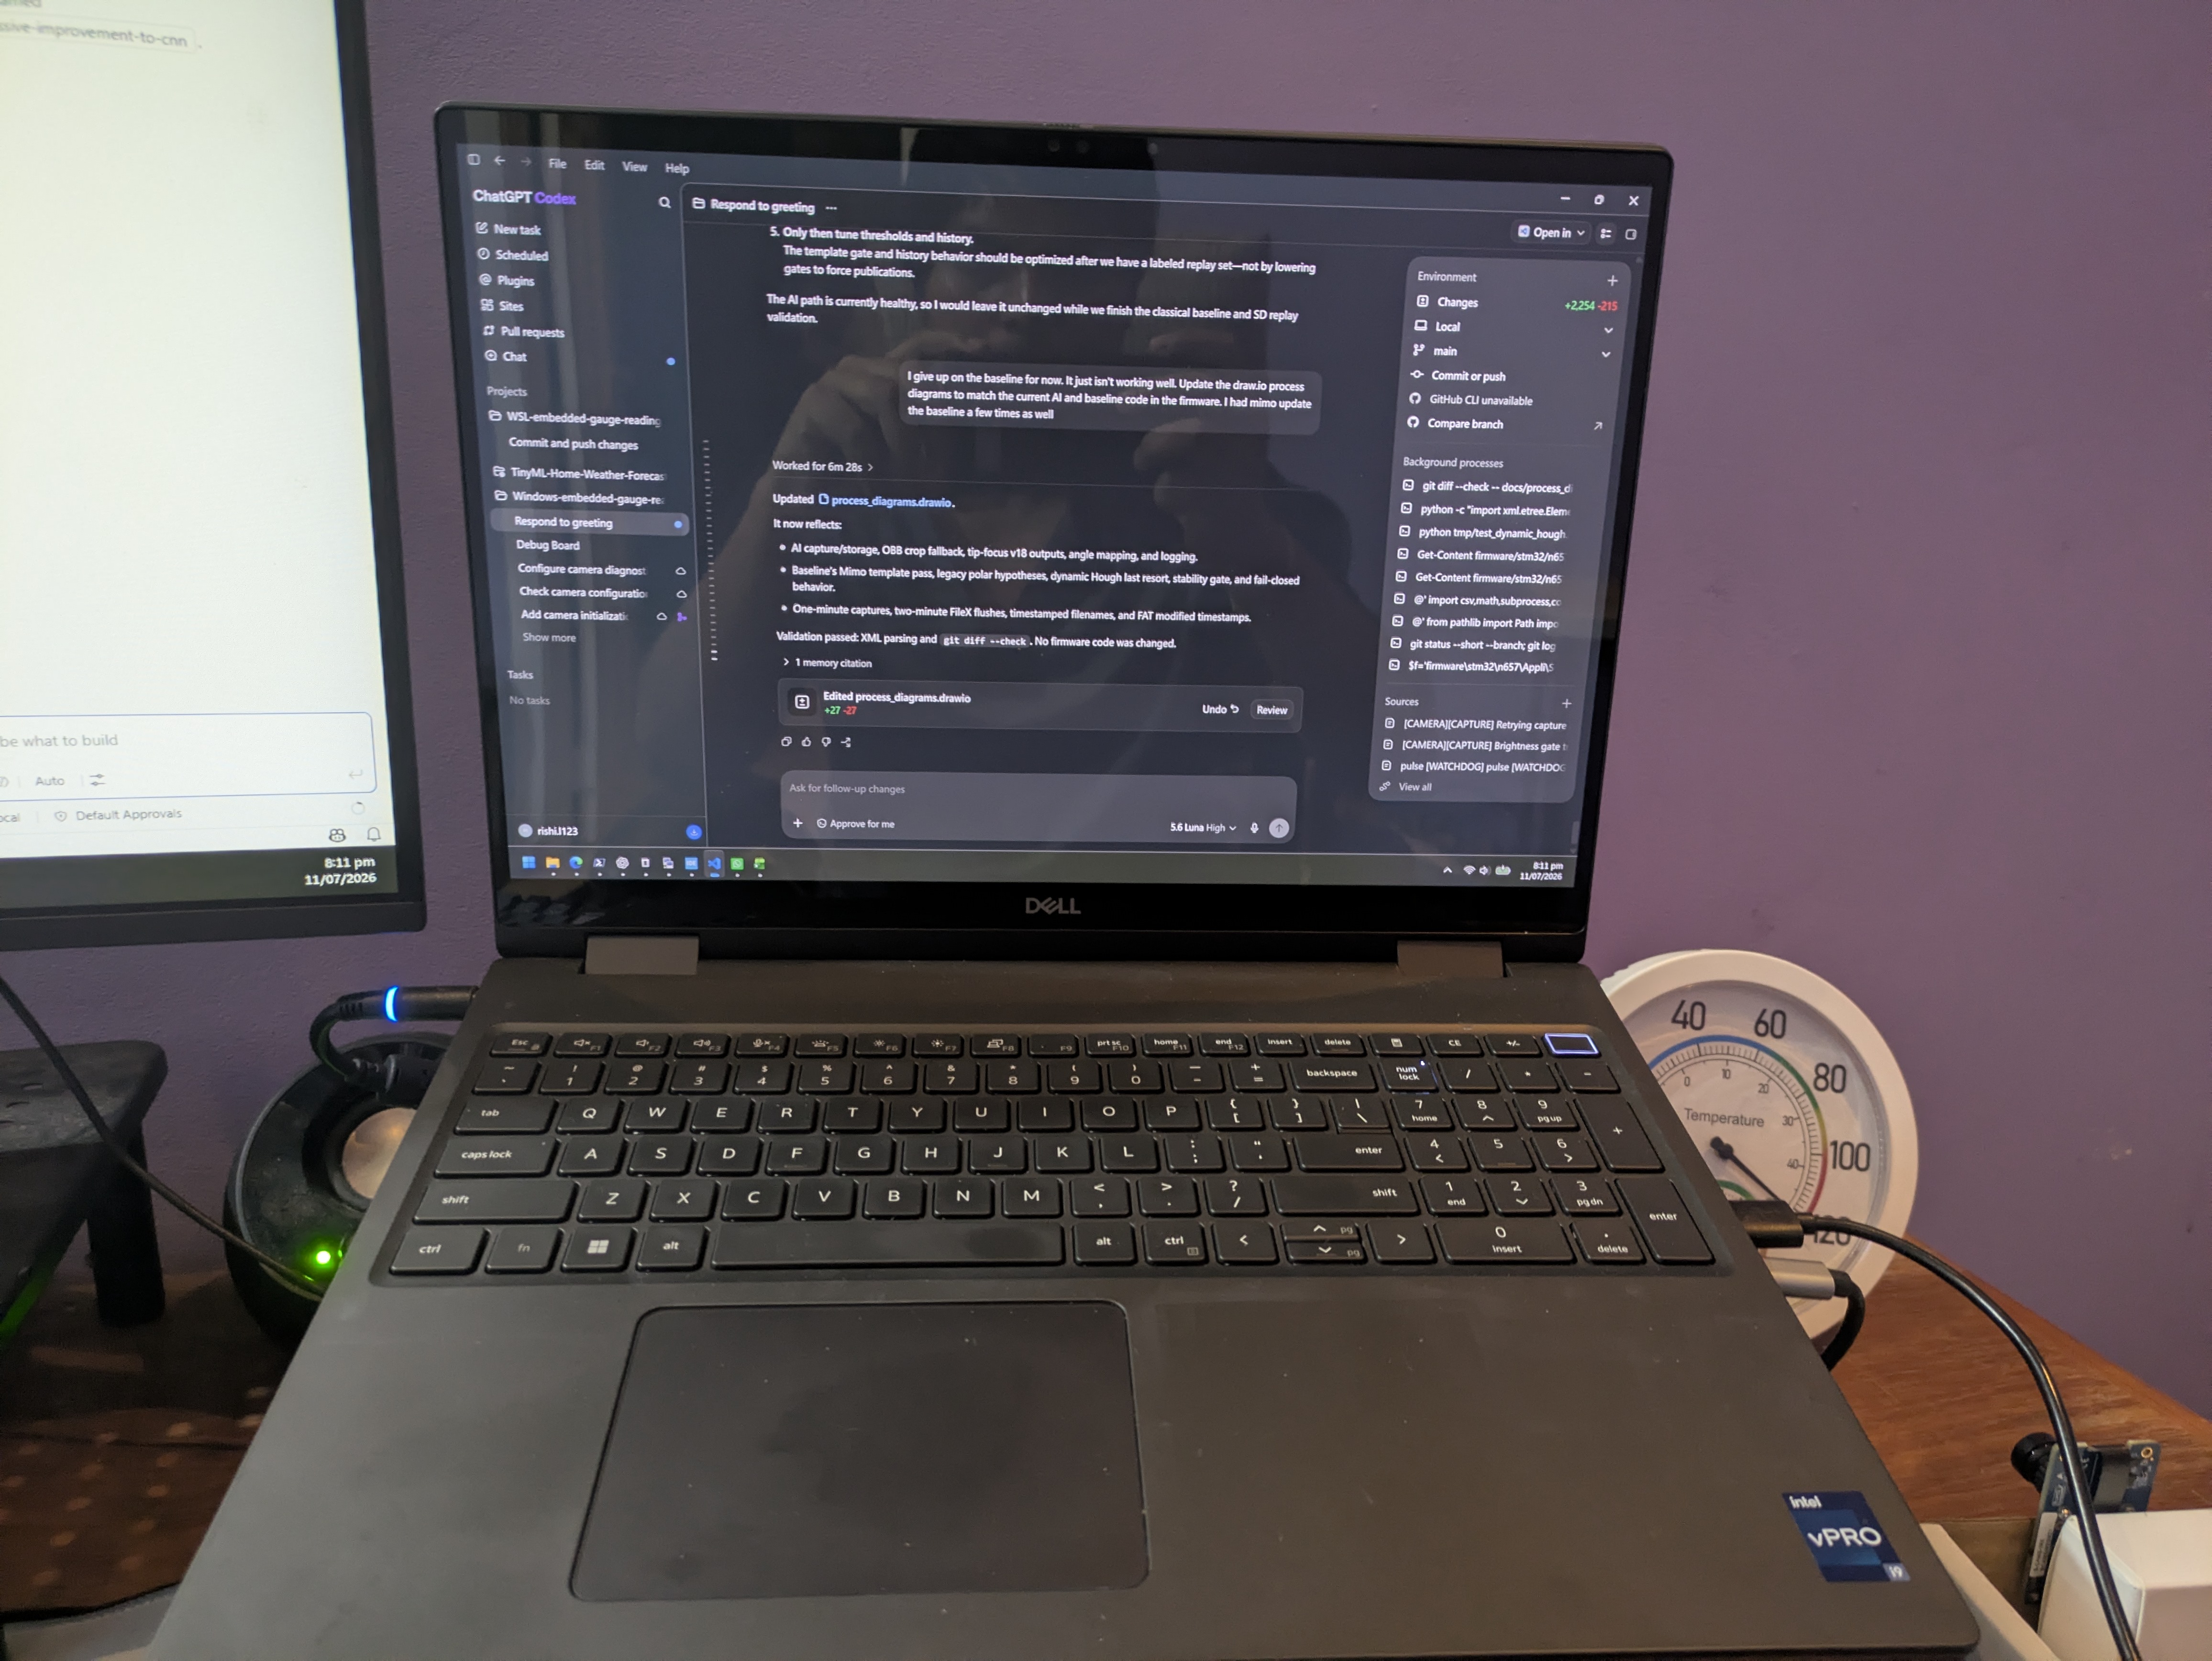
It’s been over two months since my last post, but a lot has gone on in that time. The biggest change for sure has been in my development environment. I wasn’t 100% convinced that I needed a new laptop. I had been on and off the idea for about a year, but the issues I was facing finally pushed me over the edge. My old Asus laptop had a major display issue, where the built-in display would flicker every couple of minutes, and more importantly, I couldn’t train CNNs properly because of the limited 4GB of GPU memory. I got a new Dell Precision laptop with a GPU that has a massive 16GB of VRAM, and the results have been immediately better. Here’s an image of the laptop.
I was able to use knowledge distillation to train a bigger teacher model, and distill that performance down to a smaller board model.
Training Lessons
During my many weeks of iterative testing as well, I picked up on a few important points besides this big GPU advantage. I learnt that the NPU on this STM32 N6 board can only operate on int8-quantized models. I also realized that a lot of models that were performing well in float32 or float16 space completely collapsed when quantized down to int8. I therefore now prefer Quantization Aware Training (QAT) for most models going on this board, as it helps prevent that. Basically, from my understanding, there are certain operations/layers that are well supported in int8/quantized operations, and other operations that should be avoided.
The other big change I noticed was that inference data has to match training data almost exactly. I went through the entire training data loop again with labelled board images taken right off the board, and that was the other major thing that helped the new CNN perform well. Instead of trying to use the high-quality pictures I took of the gauge with my phone, I took pictures of the gauge with the IMX camera itself and labelled those with CVAT, and this forced the model to learn features of images just like the live firmware on board will capture.
Also, I realized that there was a big difference between model size and model activation size. I assumed that our 4.2MB SRAM limit meant that the models we developed had to fit in that (along with the firmware of course). However, I recently learnt that the model weights are stored in the 64MB flash of the board, and the important part is the parts of the model which are activated simultaneously, as these need to be loaded into SRAM to work. We can therefore store a large model in the flash memory, and restrict the simultaneous activations in SRAM to get the model to run.
The Updated Pipeline
Classical CV Baseline
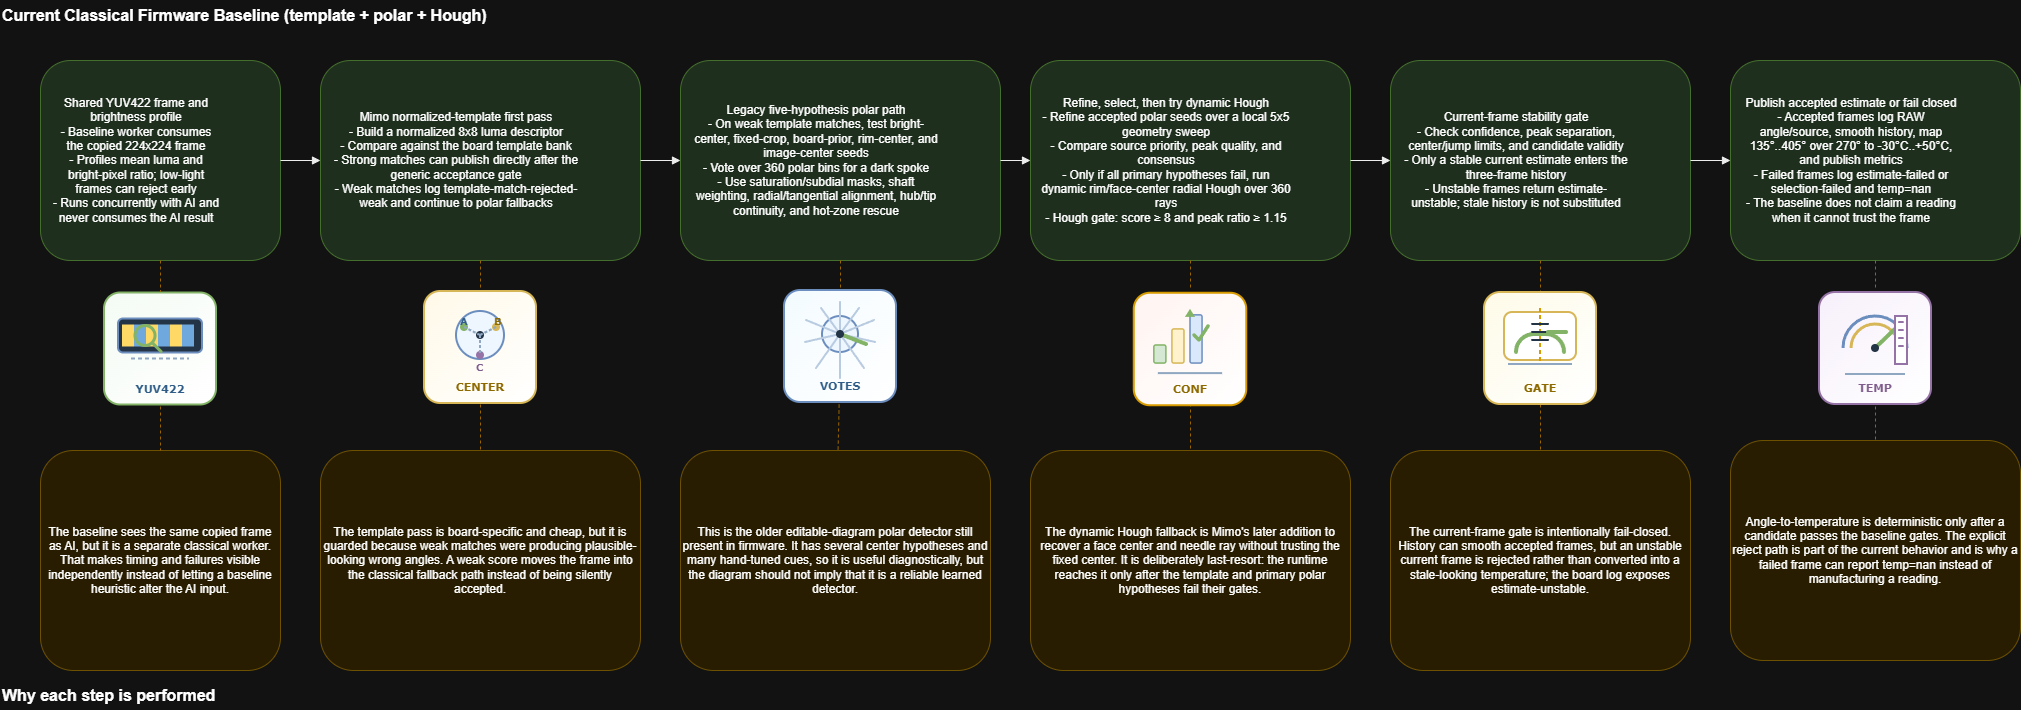
Here is the classical CV process for comparison. Honestly, this one will need to be updated significantly as we go on, because it’s still performing poorly. I just don’t want to spend any more time on it right now because this isn’t the area that my research will really add value in.
CNN Pipeline
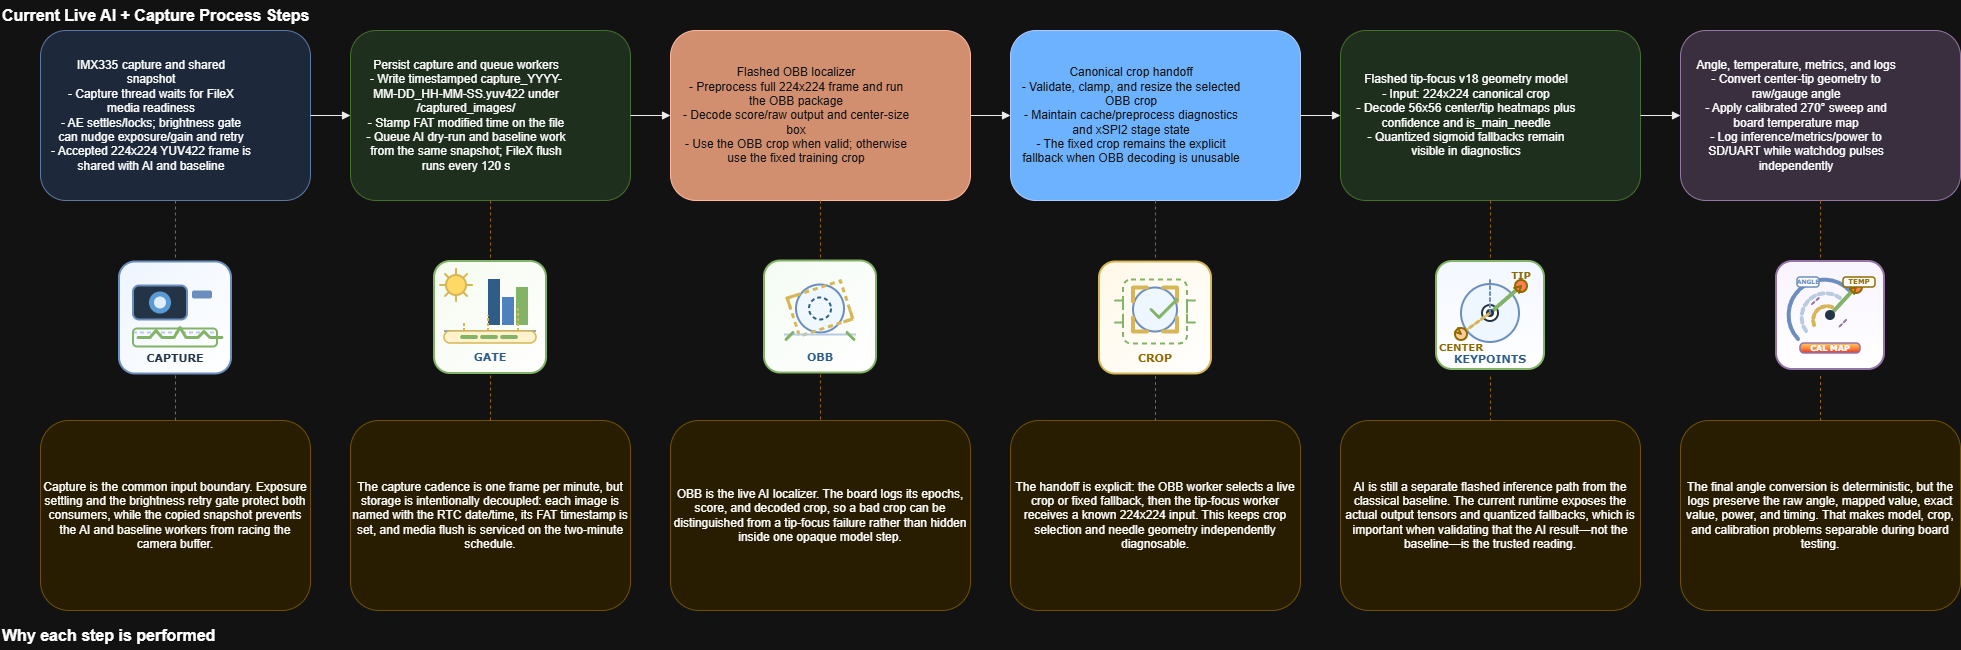
The CNN-based process is as follows. We have a two-stage CNN model now. The first set of steps is concerned with the OBB layer. They try to pick out the gauge face and crop the entire image to just that region. The second stage tries to identify the important geometry of the image: the gauge center and needle tip.
Second Trial Results
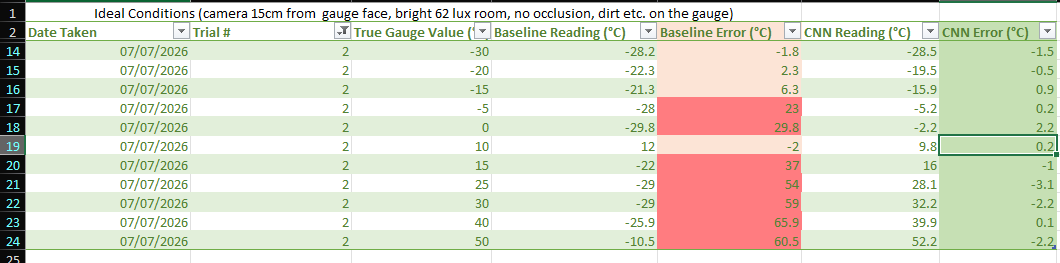
As we can see from these second-trial results, the CNN is performing really well. Readings are still off by 2–3°C, but we can tolerate that error for now.
What’s Next
After all this work, my next step is to generalize the result. I need to be able to show that the models can work on other gauges as well. I have been reading papers on Siamese models for few-shot learning, which could allow us to take just a few images of a new gauge and have the models learn how to read them. I am using some larger gauge datasets as well to help with the training.